This page is the central point on which are published resources for the Advanced programming in Java course.
Lecture Slides
- Lecture 1: The Java Language
- Lecture 2: The Java Virtual Machine
- Lecture 3: The Software Development Process
- Additional documents:
Hands-On Exercises
You have 6 lab sessions to get acquainted with the java API for tasks that you will be commonly doing in the project:
- Threads & concurrency: 2 lab sessions (2h30)
- Networking (UDP / TCP): 2 lab sessions (2h30)
- Graphical User Interface (Swing): 2 lab sessions (2h30)
The objectives of these sessions are:
- for you to gain some theoretical and practical insights on the java standard library
- develop some pieces of code that you will be able to reuse for the chatsystem project
So please do not rush through the sessions. Make sure to organize your code in such a way that you can find the relevant piece of information when you come back to it in one or two months.
The subjects may be fairly long, but it is not a problem if you do not complete them in the allocated time slots. However, all subjects covered in the exercises are important to succeed in the chatsystem project.
Evaluation
Evaluation of the course is based on:
- an intermediate evaluation (quiz + code exercises) early December (~25% of the grade)
- the results of the chatsystem project (code + documentation) (~75% of the grade)
AI use policy
The students are not allowed to use AI auto-completion in their IDE during the hands-on sessions (practical work and labs). The reason is that, while AIs may be useful to get things done, the problem is that they propose solutions to problems that the students did not even formulate. This is obviously a very bad thing for learning which is the only objective of this course (we do not care if you code works).
Other sources of information (chat-based AI, stack overflow) are allowed but should as always be used with care in order to maximize your learning objectives.
No AI usage will be allowed for the intermediate exam code exercises.
Threads
The Java language supports concurrency by providing an API to create and manipulate OS Threads: the Thread class.
References:
Accessing the current thread
-
Save the following code in a file named
Concurrency.java(the file should have the same name as the class it contains) -
Execute the file, which can be:
- on the command line:
java Concurrency.java - in your favorite IDE (unless your favorite IDE isn't IntelliJ IDEA, in which case we strongly suggest using IntelliJ IDEA)
- on the command line:
public class Concurrency {

    public static void log(Object o) {
        Thread thread = Thread.currentThread();
        System.out.println("[" + thread.getName() + "] " + o);
    }

    public static void main(String[] args) {
        log("hello");
    }
}
- What does the log function do?
- What is the name of the thread in which the main function is executing?
The Thread.currentThread() method lends you a description of the OS Thread on which the calling function is executing, in the form of an instance of Thread.
By default, there is a unique thread, used to execute your main function Note: that the JVM process may launch additional threads for, e.g., garbage collection or JIT compilation.
- What is the priority of the default thread? (use the javadoc linked at the top)
Creating Java threads
While the JVM creates a main thread to run you program, you have the possibility of creating and starting your own thread.
For this you should:
- create a new
Threadinstance and provide it with the code to run on the thread (we will see two methods for this) - call the
start()method of theThreadinstance.
Method 1: Extending Thread
The first way to specify the code to run by extending the Thread class and overriding the run()method.
⚠ Never execute the run() method: it will NOT start a new thread.
private static class GreeterThread extends Thread {
    @Override
    public void run() {
        log("Greetings !!!");
    }
}
public static void main(String[] args) {
    Thread t = new GreeterThread();
    t.start();  // NOT run() !
}
- Run the above code. What's the name of the Thread on which the greetings are made?
-
If you replace
start()withrun(), what is the difference ? (make sure to UNDO this change!) - Before starting it, set the name of the thread to something more meaningful.
-
Update the
GreeterThreadso that you can give it the name of the person to greet as an attribute of the class.
Method 2: Providing a Runnable to the Thread
The other possibility to provide executable code to a thread is to give it a Runnable object.
The Runnable interface lets you implement a single run() method that specify code to be executed later.
When a Runnable instance is passed in the parameters of a Thread's constructor, the runnable is stored inside the thread instance and will be executed by the start() method:
private static class GreeterRunnable implements Runnable {
    @Override
    public void run() {
        log("Hi from runnable");
    }
}

public static void main(String[] args) {
    Thread t = new Thread(new GreeterRunnable());
    t.start();
}
Alternative syntax: Instead of explicitly declaring a new GreeterRunnable class, you can instead use an inline class that implicitly creates a subclass of Runnable:
Thread t = new Thread(new Runnable() {
    @Override
    public void run() {
        log("Hi from runnable");
    }
});
t.start();
Alternative syntax: since the Runnable a Single Abstract Method (SAM class), you can use the lambda notation to define it. The code below is equivalent to the one above. (notes on functional interface)
Thread t = new Thread(() -> log("Hi from runnable"));
t.start();
Exercise:
Write a function that takes as input a list of Strings and for each name in the list greets it from a distinct thread (you should start as many threads as they are names).
private static void greetAll(List<String> names) {
   ...
}
Exercise: By joining threads, make sure that all persons are greeted in the original order. (You will need to look into the javadoc of Thread)
Pausing Threads (sleep)
The Thread class proposes a static method to pause the current thread for given amount of time: Thread.sleep().
Exercise: Use this to create a ticker thread that will indefinitely print tick on the standard output every second.
Stopping Threads
With your ticker, it should be the case that your program never terminates, which is probably not what is intended.
The rule is:
- a thread stops when its
run()method terminates - the JVM will keep running until all non-daemon threads are terminated.
Exercise: Configure your ticker to be a daemon thread and check that it does not prevent the JVM from exiting anymore.
Now turn back your ticker to non-daemon, we are going to stop it.
Exercise: Modify your ticker class so that it has a boolean field saying whether it should stop
⚠ Like ALL datastructures that are accessed by multiple threads, you should take defensive measures to prevent data races. (Here, an AtomicBoolean might be found useful).
While doing the previous exercises, you may have found out that some operations (join and sleep) may throw and InterruptedException when interrupted.
Exercise: Use the Thread.interrupt() method to gracefully halt the Thread without needing a boolean flag. By gracefully, we mean that your program should not crash down in flames while filling the standard output with exceptions. Instead your ticker thread should die of peaceful natural death (i.e. by reaching the end of its run() method).
Scheduling Tasks
References:
Exercise: Using the Timer class, reimplement your ticker to run every second and count the elapsed seconds.
-
Compared to your previous implementation with a sleep, what are the additional guarantees that you get from the
TimerAPI? - Can you schedule multiple tasks with the same timer ?
- Is the thread on which the timer is running a daemon thread ?
Synchronization
Preliminary Exercise: Using normal threads create a situation whee you can witness a race condition.
While there are many options, the easiest is probably to increment a static int from multiple threads.
Read the following tutorial on the synchronized keyword: tutorial synchronized
- Use the synchronized keyword to remove the data race of your int counter.
Exercise: Use the synchronized keyword to implement a ConcurrentQueue: a thread safe implementation of a FIFO queue where there might be several producer threads and several consumer threads working concurrently.
To keep things simple in the beginning:
- make your queue only hold
Objectvalues - throw an exception if the queue is empty on a
pop()operation.
Test your queue on a small consumer/producer example. For instance, you can have several threads producing random numbers and a consumer that averages the numbers.
Going further:
-
make your queue implementation wait if there is a
pop()on the empty queue (you may need ajava.util.concurrent.Semaphorefor this) -
Give you queue a maximum capacity and make the producer wait if there is no space on
push(). - make your queue generic in the type of the element
-
make your queue implements the
Queue<T>interface of the standard library.
Networking (UDP / TCP)
UDP: Greeting Server (1 session)
In this session, we you will explore the API for receiving and sending UDP message in Java.
Reference Code & Quiz
You are given the following example code that both send and receive UDP messages.
import java.io.IOException;
import java.net.*;

public class Net {

    public static void main(String[] args) throws IOException {
        DatagramSocket socket = new DatagramSocket(4445);
        boolean running = true;
        byte[] buf = new byte[256];

        while (running) {
            DatagramPacket inPacket  = new DatagramPacket(buf, buf.length);
            socket.receive(inPacket);
            String received = new String(inPacket.getData(), 0, inPacket.getLength());
            System.out.println("Received: " + received);

            if (received.equals("end")) {
                running = false;
                continue;
            }

            InetAddress senderAddress = inPacket.getAddress();
            int senderPort = inPacket.getPort();
            DatagramPacket outPacket = new DatagramPacket(buf, buf.length, senderAddress, senderPort);
            socket.send(outPacket);
        }
        socket.close();
    }
}
- Reference (javadoc):
DatagramSocketDatagramPacket- XXXX: GIYF (google: XXXX javadoc 17)
By analyzing the code sample above, answer all the following questions:
Reception:
- Which lines are responsible for receiving messages?
- On which port is the server listening?
- What is the maximum size of a received message?
- What does the server do when a message is received?
Sending:
- What are the lines responsible for sending messages?
- What is the content of the message sent?
- Where is the message sent? (which address and port)
Miscellaneous:
- What class represents an IP adress?
- Under which conditions does the program terminates?
- What are the blocking operations in this code?
Hands-On exercises
Exercise: Write a Java program that:
- listens on a given port for incoming UDP connections
- when receiving the message "XXXX" prints "Greetings, XXXXX" on the standard output (i.e. in the terminal where the server is running)
For testing your program, you can use the following command to send UPD message to a given port (here 1789). Note that this will only work on linux.
# Send a UPD message (here "Alice"), on a given port (here 1789)
# on a given address (here localhost: 127.0.0.1)
echo -n "Alice" > /dev/udp/127.0.0.1/1789
Exercise: Instead of using the command line, create a new Java program that sends a message to the server. Note that you can construct an InetAddress from a string with the InetAddress.getByName() method (e.g. InetAddress.getByName("127.0.0.1")).
Exercise: Now we will combine all the code you have written into a single program.
- Adapt your server side code (the one that listens for new UDP messages) so that it is implemented in a
GreeterServerclass that extendsThread(therun()method of the thread should execute the server) - in the same program, create a
sendName(String name)method that send a nameStringto the server (essentially doing the same as your client code from earlier) - In the
mainmethod, start a greeter server thread - In the same
main, use thesendNamemethod to send several messages to the server.
Exercise: In addition to the name of the person, print the IP address from where the message was sent. Check that this work by sending a message from another machine (suggestion: use SSH and the echo command above)
TCP (1 session)
Your objective in this session is to write an averaging service over TCP.
In a nutshell, it means that you will have a server running to which any user can connect. Once a user is connected, it may start sending numbers (integers) to the server. Each time the user sends a new number, the server must answer with the average of the number received so far from this user.
Example of what a session should look like:
Welcome to the averaging client.
Please enter the next number.
> 6
Sending to server awaiting response...
Received current average: 6.0 (computed on our HPC cluster)
Please enter the next number.
> 9
Sending to server awaiting response...
Received current average: 7.5 (computed on our HPC cluster)
Note that:
- multiple users must be able to connect to your server at the same time
- you must not mix the numbers of two users
Ready? Code! (but you may want to look at the resources below ;)
Useful Resources for this exercise
The tutorial below introduces all concepts that are useful for you to know for this exercise. Take the time to read it carefully.
Reading/Writing Data to Streams
The Java standard library provides abstractions for input/output with two main classes:
InputStream: anything you can read from (standard input, files, incoming sockets, ...)OutputStream: anything you can write to (standard output, files, outgoing sockets, ...)
These two classes are fairly low-level and allow you to read/write bytes. Since this is usually to low-level, the standard library provides many wrappers around those classes that extend their capabilities.
In particular, useful for today's exercise are the DataOutputStream and DataInputStream classes. When wrapping the input/output streams of a socket, they allow you to transfer common java primitives (ints, doubles, ...).
Below are two examples for reading/writing double to sockets.
static void writeDoubleToSocket(Socket socket, double number) throws IOException {
    DataOutputStream out = new DataOutputStream(socket.getOutputStream());
    out.writeDouble(number);
}

static double readDoubleFromSocket(Socket socket) throws IOException {
    DataInputStream in = new DataInputStream(socket.getInputStream());
    return in.readDouble();
}
Reading from standard input
Below is an example code that reads an integer from the console (standard input). In Java, the standard input is accessible through the System.in object (of type... InputStream).
/** Reads an integer from the standard input and returns it.
 *
 *  If the user enters an invalid text, he will be prompted to retry.
 */
static int readIntFromConsole() throws IOException {
    // System.in is an InputStream which we wrap into the more capable BufferedReader
    BufferedReader reader = new BufferedReader(new InputStreamReader(System.in));

    while (true) {
        String input = reader.readLine();
        try {
            int n = Integer.parseInt(input);
            return n;
        } catch (NumberFormatException e) {
            System.out.print("Not an integer, try again: ");
        }
    }
}
In this hands-on session, the objective is to get acquainted with the Swing java library.
The session heavily relies on the official Swing tutorial. The objective of this page is to give you a low friction path through the main concepts in Swing. Concepts are discussed in depth in the documentation and you will also find a wealth of examples that illustrate all concepts.
Main Window (Frame)
You are given the following code as a starting point. Run it on you machine and try to answer the questions below.
import java.awt.*;
import javax.swing.*;

public class FrameDemo {
    /**
     * Create the GUI and show it.  For thread safety,
     * this method should be invoked from the
     * event-dispatching thread.
     */
    private static void createAndShowGUI() {
        // Create and set up the window.
        JFrame frame = new JFrame("FrameDemo");
        frame.setDefaultCloseOperation(JFrame.EXIT_ON_CLOSE);

        JLabel emptyLabel = new JLabel("Greetings Swinger");
        emptyLabel.setPreferredSize(new Dimension(175, 100));
        frame.getContentPane().add(emptyLabel, BorderLayout.CENTER);

        // make window's dimension fit its content
        frame.pack();
        // Display the window.
        frame.setVisible(true);
    }

    public static void main(String[] args) {
        // Schedule a job for the event-dispatching thread:
        // creating and showing this application's GUI.
        javax.swing.SwingUtilities.invokeLater(new Runnable() {
            public void run() {
                createAndShowGUI();
            }
        });
    }
}
Questions:
- Change the title of the window to something more catchy.
- What is the purpose of the
setDefaultCloseOperation(JFrame.EXIT_ON_CLOSE)line? Verify you assumption by removing the line. Is the program still running after closing the window? - which line decides the size of the
JLabel? What happens if you:- remove it?
- make it smaller than the text?
- Which line is used to determine the window's size? What happens if you remove it?
A JFrame is a top-level container. Each application has at least one top-level containers in which other components are placed.
JLabel
The label is the most basic component in Swing. It allows displaying short text or images. So far you have used to display a raw text, but it supports several features to control how a text should be displayed, either through the JLabel API or through HTML.
Exercises:
- Make the label's text centered
- Make the text of the label red
Having several components in a frame
Each container is associated to layouts that determines how its component are organized in two dimensions:
In the case of the JFrame, the default layout is a BorderLayout
Exercise:
-
In which part of the frame's
BorderLayoutis ourJLabeldisplayed? -
Add a new button in the bottom part of the frame (
JButton button = new JButton("Click Me!")) -
What happens if you add more than on component to the part of the layout?
Laying Out Components: grouping with JPanel
Now that we are Swing power-users, we wish to build a real application: a counter. In order to get founding for the start-up, you need an MVP, that:
- displays the current value of the counter at the center,
- provides two buttons at the bottom to respectively decrease and increase the counter.
You are now facing a major technical problem: it is impossible to add two components at the bottom of the frame... Luckily an expensive consulting company (McKinsa), gives you the solution:
Indeed, you can only place a single component at the bottom of a BorderLayout. However, when facing this situation you can group your buttons in a JPanel container. This will essentially create a new component containing you two buttons. You can then place it where you want in the frame.
- JPanel
- Flow Layout (default for JPanel)
- BoxLayout (another common layout)
Exercise:
Place two buttons "-" and "+" at the bottom of your counter app.
Buttons and events
So far, we have displayed buttons but nothing was happening when clicking on them. This is made possible by the Oberserver design pattern implemented by the buttons.
Each button has a list of ActionListener. Each time an action (e.g. a click) happens on this button, the actionPerformed(...) method of each listener is called; Some context on the action is provided in ActionEvent parameter.
public void actionPerformed(ActionEvent e) {
    ...// code that reacts to the action...
}
Exercise: For each button, create an ActionListener that prints MINUS/PLUS to the standard output when the button is clicked.
Custom components
One of the (very few) great things about Object-Oriented Programming is that you can specialize an existing class for your purpose. In GUI programming, this comes extremely handy as it allows providing custom components very easily.
Exercise:
-
Complete the following subclass of
JLabelso that it displays the current value of thecounterin its text field anytime the counter is updated with thesetCounter()method. Note that, like anyJLabel, it has asetText(...)method to update the text of -
Replace the
JLabelyou previously used in the counter application by your newCounterComponent -
Update your actions listener to call the
decrease()/increase()methods of the component.
static class CounterComponent extends JLabel {
    private int counter = 0;
    public CounterComponent() {
        // set style, dimensions, ...
    }

    void setCounter(int newValue) {
        ...
    }

    void increase() {
        ...
    }

    void decrease() {
        ...
    }
}
Text fields
NASA has a great use case for your counter to serve has the central component for the count-down before launch.
Problem is, in the current version, the launch officer has to click 10 times on the + button before starting the countdown.
Exercise: Make the counter editable by using a JTextField instead of a JLabel as the base class for CounterComponent. Make sure that the count number can still be updated with the buttons.
Exercise: Add a new Start Countdown button that would:
- decrement the counter every second (remember the lab on
Threads andTimers) - Display a dialog when the countdown reaches 0 (be creative with its content)
Requirements
You are tasked to develop a decentralized chatsystem for a fortune 50 company (whose name we are not allowed to disclose).
Their objective with this tool is to provide their employees with an easy to deploy communication tool from within the company. After long meetings with the client, the following document was produced to capture the requirements of the application you are tasked to develop.
Technical information:
- within the company each employee is assigned its own machine, with a fixed IP address
- all machines of the company are on the same local network (similar to the setting of lab rooms at the department)
Roadmap
Phase 1: Contact Discovery
Duration: from October 2nd until November 16th
Objectives: provide a software library to handle the discovery of contacts in the local network. It should notably provide the following features:
- upon connection, discover connected users in the local network
- once up and running, detect new users
- maintain a contact list with the unique identifiers and nickname of each connected user
Dedicated sessions:
- 3 COO sessions (1h15 each): to provide an initial conception for contact discovery
- 4 java lab sessions (2h45 each) to implement the library
Milestone: On November 16th, you have to hand out to your teacher a working implementation for the contact discovery.
Phase 2: Intermediate Evaluation
Duration: from November 17th until November 23th
During this week, you will be given some additional elements (lectures, code examples, ...), tutoring and time to reflect on the results from phase 1. With the objective of correcting problems and limitation for the next phase.
You will not be given any grade at this point.
Phase 3: Complete Project
Duration: November 25th until end of January
In this phase, you will have to complete the implementation of the chatsystem project
Dedicated sessions:
- 4 COO sessions (1h15 each) to complete your conception
- 6 lab sessions of advanced programming (2h45 each) to complete your implementation
Milestone: At the end of January, you must handout a complete implementation for the chatsystem together with the associated documentation. (exact date to be determined)
Evaluation Criteria (Advanced Prog)
Below is a list of the criteria that will be used to grade your projects.
- quality:
- README: Presence and completeness of the README
- maven: Does the project compiles and run based on the
pom.xmlfile only. - tests: Proportion of the code covered by the tests. Are the tests sensible, correct and well organized
- repository: Structure of the git repository (directories, gitignore, presence of undesired files)
- structure: Structure of the code into sensible and independent packages
- reliability: Thread safety and error handling
- style: Variable naming, indentation, comments, ...
- functionalities:
- discovery: Connection and contact discovery phase
- messaging: Peer2peer messaging
- interface: Is the interface functional, complete, ergonomic, beautiful
- db: Handling of the history of message
- extra: Placeholder for non-basic features (image, avatars, resend on connection, ...)
- report:
- structure: General structure and conciseness
- motivation: Presentation of the reasons behind the technical choices guidelines: Usage guidelines
- tests: Presentation of the testing campaign
For each criterion, you will be given a grade between A+ and D, with the following semantic:
- A: Mastered (what I was hoping for)
- B: Concepts appear to be reasonably assimilated, with progress still possible in their exploitation
- C: Clearly insufficient
- D: Absent or completely wrong
As much as possible, you will be given a comment for each of the grade. This is of course very time-consuming for us, so focus will be given on parts where you can leverage them (i.e. especially in the quality section).
The formula to compute the final grade will be kept secret, as it remains subject to adjustements (clue: it can be perfectly learned with a perceptron).
Note: this only covers the advanced programming part of the course. You will be given independent grades for the conception (UML) and project management parts.
Release Checklist
In this document, we give you a set of things to check before handing out your final project. Note that this checklist is not specific to the chatsystem project and could be applied to any software project.
You should check that your project fulfills all items before handing out the final project, at the end of the semester. You may want to keep them in mind as guidelines during project development.
Checklist
-
Your repository has the
metadata.ymlfile, up to date with your names and addresses (otherwise, we can't identify you, and you won't get a grade) -
The repository has a README file containing:
- A few lines describing the nature and goals of the project
- Instructions on how to compile and run the program from the source code
- The project can be compiled and executed without manual installation of dependencies.
This implies that all dependencies should be declared in the Maven configuration file. It is acceptable to have a few well-identified commands to execute, such as to initialize a database.
- Tests pass (implicitly, there should be tests).
An excellent way to ensure the above elements (compilation and tests working on machines other than your own) is to set up continuous integration. For example, you can use GitHub Actions (see an example configuration here: GitHub Actions Example). Note that your tests must be runnable on machines other than yours (even if it requires some initial setup). If another developer joins the project, they should be able to run the tests.
-
The Git repository is clean.
- No compilation artifacts in the repository (e.g., .class files).
- No configuration files (.idea, .project) in the repository.
-
The
.gitignorefile is comprehensive (e.g., it prevents the addition of the mentioned files above). - Commits are of reasonable size with meaningful messages.
In general, you should be able to justify the presence of any file in your Git repository. There should normally be no files that are automatically generated from other files in the repository. Similarly, there should be no files specific to your machine/IDE.
- The code is structured into independent packages, organized in layers (e.g., the network layer should not have knowledge or access to the user interface or the database).
-
Your code is reliable.
- Errors are handled properly: The decision (1) to ignore an error, (2) to simply display it, or (3) to stop processing and return the error is justified.
- Your thread management is correct: no deadlocks, protection against concurrent access.
Procedure
- Find another team to evaluate within the group
- Clone their repository (they should give you the rights to access the repository)
- Copy the evaluation form below in a local file (e.g.
peer-review.md, where the.mdstands for Markdown) - Fill in the evaluation form (which requires you to run the code, look at the tests, look at the code)
- when you are done, submit a github issue on their repository with the content of the evaluation. The name of the issue should start with
[PEER REVIEW]
Evaluation form
For each criterion, you should give a grade between A+ and D, with the following semantic:
- A: Mastered
- B: Concepts appear to be reasonably assimilated, with progress still possible in their exploitation
- C: Clearly insufficient
- D: Absent or completely wrong
---
Evaluated team:
 - SURNAME1
 - SURNAME2
Evaluators:
 - SURNAME1
 - SURNAME2
...

# Functionalities

## discovery
<!-- Connection and contact discovery phase -->

grade: ?

comments: ...

## Presentation of contacts/error
<!-- How readable and user friendly is the presented output. -->

grade: ?

comments:


# Quality

## README
<!-- Presence and completeness of the README -->

grade: ?

comments: ...


## maven
<!-- Does the project compiles and run based on the `pom.xml` file only. -->

grade: ?

comments: ...


## tests
<!-- Proportion of the code covered by the tests. Are the tests sensible, correct and well organized -->

grade: ?

comments: ...


## repository
<!-- Structure of the git repository (directories, gitignore, presence of undesired files) -->

grade: ?

comments: ...


## structure
<!-- Structure of the code into sensible and independent packages -->

grade: ?

comments: ...


## reliability
<!-- Thread safety and error handling -->

grade: ?

comments: ...


## style
<!-- Variable naming, indentation, comments, ... -->

grade: ?

comments: ...
Objectives
Now that you have finished the first milestone, the objective of this phase is to reflect on what you have produced so far.
For this, we provide you with some example code for contact discovery:
What's in there
The code presented there is less ambitious than the one you add for your first milestone. In a nutshell, it simply listens on a single port for incoming UDP messages containing the name of a contact to add to the contact list.
As such, it is not a correction for what you have produced but instead aims at demonstrating some of the things that one should find in a typical java project:
- build configuration: this project can be run and imported based only on the
pom.xmlfile. - code organization: code is organized in loosely coupled packages. For instance, the packages
chatsystem.networkandchatsystem.contactsare completely independent of each other and only combined in the main class. - thread safety: access to shared resources (e.g. the contact list) is protected by mutex (with the java
synchronizedkeyword) - tests: uses
junitfor testing both the network code, the user list code and their combined usage. - error handling: custom error types (e.g.
chatsystem.contacts.ContactAlreadyExists), and explicit handling of unrecoverable error (error raised higher the chain of responsibility) or recoverable error (handled locally and continue processing) - observer design pattern:
- implemented by the
UDPServerclass to make it adaptable to different contexts - used by the view to have it react to changes in the contact list
- implemented by the
- singleton design pattern: to ensure that there is a unique instance of the
ContactListand that is usable across the application - logging: usage of the log4j library (the configuration provided simply prints to the console)
- continuous integration: each time the code is pushed to github, the code is compiled and tested (and a notification is sent if that fails). This is enabled by the
.github/worflows/java.yamlfile that sets up Github actions. - consistent coding style: the code here (loosely) adheres to the Java Coding Conventions that are used by virtually all java programmers.
How to use it
The final code is given for reference. For each commit, we provide you with a video of your instructor writing down the code and commenting on why it is done this way.
The explanations in the recordings are not very detailed to keep the videos reasonably short and to the point. It is our assumptions that, with your experience from the first milestone, these are sufficient for you to grasp the technical details and the motivation for what is presented. But of course, feel free to ask your instructors if something remains unclear after spending some time on it.
These series of videos are split in two parts:
- one focused on setting up the project and implementing the network stack
- one focused on implementing the contact list and integrating it into a complete program
Before each video is given a list of the topics you can expect to be covered and a link to the commit of the code written. The videos are given in chronological order: at the beginning of the first one, the repository is empty and at the end of the last, the repository is as it is today.
Setup
- creation of empty project
- initial maven configuration
- gitignore
UDP Server
-
UDP server creation
-
Error handling:
- local recovery (retry listening)
- notify caller (failure to bind port in server)
- tear down application on fatal error (failure to start UDP server)
UDP Sender
- methods for sending UDP messages
- usage of static methods (when no context/state is needed from a class)
Data classes: UDPMessage
- data classes:
- record syntax
- overriding equals, hashCode, toString
UDPServer: Observer Pattern
- implement an Observer design pattern
- make library code generic and customizable
UDPServer: Thread safety
- prevent potential data races when accessing class data.
Test
- setting up tests with junit
- exploitation of the observer to gather the results of the test code
Note: When modifying pom.xml, you may need to update the project configuration (IntelliJ IDEA: right click on pom.xml > Maven > Reload Project)
Continuous Integration
- setting up the continuous integration to run compilation and tests with Github actions
Logging
- import the
log4jlibrary - add logging messages at different levels
- configure the logger
- with configuration file (default configuration)
- manually override log level to select the appropriate level for the use case (tests vs user-facing programs)
Note: the listening port can be found with socket.getLocalPort() (fixed in the git)
Creation of the contact list
- test driven development
- synchronize accesses to data holder (preventing data races)
- defensive copy of shared data
Test exceptions
Minor trick to ease the testing of code that should throw exceptions.
Singleton design pattern for the ContactList
- Implement a singleton
- Setting up test environment (
@BeforeEachannotation)
Wiring the backend
- have the contact list be updated on new messages
- test message handling logic by simulating message arrival
Implementing the View
- observer pattern to have the view react to model changes
README + Wrapping Up
- Shows how to add and typeset a README in the Markdown format
Organization
- Date:: December 8th
- Duration: 1h (+20 minutes for students with extra time)
- Place: the evaluation will be carried out on a physical machine with exam-specific accounts.
- Scoring: the result of the evaluation will count for 25% of the final grade
Scope
The exam is meant to evaluate your basic skills and knowledge with respect to the Java programming language and environment.
The subjects on which you will be challenged are covered in the course (see slides in the Overview section), in the Exercises labs (threads and networking), and in the videos.
The exam will have two parts:
- Quiz on moodle (20-30 minutes): you will have to answer questions related to the java language and the JVM.
- Hands-on java programming (30-40 minutes): you will have to modify a small existing code base to make it pass some predefined unit tests.
Notes: as it will be carried out on exam-specific accounts you will not have access to your specific environment. You will have access to maven and pre-installed text editors. Make sure you know how to use mvn to compile and run tests on a Linux distribution.
You can bring your own keyboard (QWERTY, DVORAK, ...) if you are not happy with the AZERTY layout, but you will not be able to use your own machine.
Training for the exam
Just make sure you have well understood the concepts presented in the course and labs. The programming tasks should very straightforward if you are at ease with them.
As already mentioned you should be at ease with maven to build and run tests on the command line.
You can download here an archive that contains a maven project simpler but representative of the one you will be given during the exam. The objective of giving you this is to make sure you understand the environment and commands that you will face.
Process to complete (will be the same for the exam):
- Download and unzip the archive (unnecessary for the exam itself)
- Read the
README - run
mvn compile-> it will fail because you do not have filled in your first and last names in the code. - Fill in your names
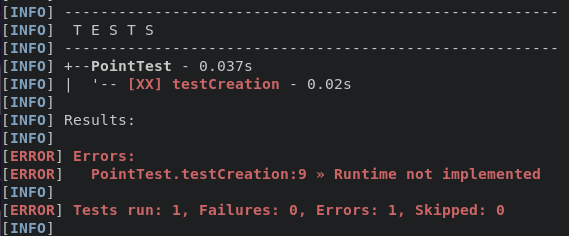
mvn compile-> it compiles \o/mvn test-> will show test failures, like in the image below- Select the next test to fix, fix it and go back to 6.
FAQ
- Do we have access to documents during the exam?
- No documents or network access allowed during the Quiz
- Documents and network access is allowed during the programming part (for accessing the course website, stackoverflow, ... but not ChatGPT or other LLM).
- What is the type of programs that will be written for the second part?
- You will be asked to complete several very small functions. There is no puzzle, design patterns or algorithmics involved. Just assessing if you are able to complete very simple programming tasks rapidly (which requires you to be fast and know the essential properties and idioms of the language).
Feedback on intermediate evaluation
Below are a few items regarding the hands-on part of the evaluation.
The main lesson I would draw is that many of you apparently derived excessive confidence that if the provided tests passed, then the code was correct.
This is an important and critical mistake: the fact that you have not witnessed a bug does not mean there are none. The tests provided were fairly shallow and not sufficient to assess whether your code fulfilled the contract you were asked for (and, as advertised, the tests used for evaluation were more thorough).
Below I treat the elements that were problematic for a significant number of students and that I feel are worth going back to.
Equals
Main problem: many only implemented equals accepting a Point parameter
    public boolean equals(Point p) {  // INCORRECT
       return p.x == this.x && p.y == this.y;
The method above does NOT override any behavior because it is not the same as the method defined in Object that accepts an Object as a parameter. Among other problems, it would lead to the following behavior.
    Point a = new Point(1, 1);
    Point b = new Point(1, 1);
    Ojbect c = (Object) new Point(1, 1);
    a.equals(b); // return true
    a.equals(c); // returns false (calls the default implementation in Ojbect)
Below is a valid implementation that does override the Object.equals(Object o) method.
@Override
public boolean equals(Object o) {  // YES EQUALS SHOULD WORK FOR ANY OBJECT
    if (o == null) {
        return false;
    } else if (o instanceof Point p) {
        return p.x == this.x && p.y == this.y;
    } else {
        return false;
    }
Hash code
The only requirement for hashCode is that if two objects are equals they have the same hashCode.
Thus, there are many correct implementations. Always returning 0 is a correct implementation :
    @Override
    public int hashCode() {
        return 0; // CORRECT BUT VERY BAD
    }
However, it is a terrible implementation: all instances of Point would have the same hashCode. If we were to place them in a hash table, they would all go in the same location, and you would lose all benefit of using a hash table.
The objective of hashing is to combine the values of the different elements into a mostly unique bit pattern.
This following hash implementation is correct and reasonable but still produces many collisions on common patterns (e.g. Point(1, 2) and Point(2, 1) have the same hash)
return x + y;
The following one is better one, that is fast simple and produce be collisions:
return x * 31 + y;
But the best option is to use the hasher in the java standard library:
return Objects.hash(x, y);
There were some points for having a correct hash and some others for a hash with few collisions.
I also saw a number of incorrect hash implementations, for instance:
return x / y; // INCORRECT: would crash if y=0
Above the problem is that the implementer did not consider all edge cases in the implementation, leading to a division by zero for some inputs.
Counting characters
On the counting characters part, there were less problematic patterns coming up. But the two I want to call out for are:
Broken parallelism
I saw many cases of essentially this pattern :
   for (int i = 0 ; i< 10 ; i++) {
     Thread t = new Thread(() -> doWork());
     t.start()
     t.join()
   }
In this example, 10 new threads are started but NOTHING is done in parallel : the join ensures the started thread is finished before starting the next one.
The correct way to do this is the following (starts all the threads and then wait for all of them to finish).
    List<Thread> threads = new ArrayList();
    for (int i = 0 ; i< 10 ; i++) {
      Thread t = new Thread(() -> doWork());
      t.start()
      threads.push(t);
    }
    for (Thread t : threads) {
      t.join()
    }
Breaking backward compatibility
(This was very uncommon but important enough to call out for.)
An important problem was the modification of the methods signature, that would break compatibility with other code.
For example changing the method definition of the first method to the second may break ANY code that uses it (notably all the tests):
    public static int countOccurrencesInThread(String str, char character) {
    public static int countOccurrencesInThread(String str, char character) throws InterruptedException {
This would lead to a compilation error for any code that relied on the previous signature.
Useful Maven Commands
IDE vs Maven
The configuration of a project in an IDE (Eclipse, IntelliJ, ...) is always machine and developer specific. It should not be committed to your git repository (and present in your .gitignore file).
The correct way to do things is to describe your project configuration in a build tool (for instance Maven) which allows:
- for anybody with the build tool to compile your project
- to run automated tests from scripts
- to import your work in any IDE (typically with
Import -> Maven Project)
Installing Maven
You can use the following command to install maven on a linux machine on which you do not have admin rights (including on INSA computers):
mkdir -p ~/bin  # create a bin/ directory in your home
cd ~/bin  # jump to it
wget https://dlcdn.apache.org/maven/maven-3/3.9.5/binaries/apache-maven-3.9.5-bin.tar.gz -O maven.tar.gz  # download maven
tar xf maven.tar.gz  # decompress it
echo 'export PATH=~/bin/apache-maven-3.9.5/bin:$PATH' >> ~/.bashrc  # add mvn's directory to the PATH
source ~/.bashrc  # reload terminal configuration
You can test that it works with: mvn --version
Compilation
# Compile all classes in the project
mvn compile
# compiles all classes of the project and produces a single jar file (a jar is an archive containing several classes)
# The jar file is placed in the target directory
mvn package
Important note: if these two commands do not work on your project, it will be essentially useless to anybody that tries to use it.
Running
Running a java program requires knowing two things:
- the location of all compiled classes. For this, java uses the concept of the classpath: a list of directories and files where java will look for the compiled classes.
- the name of class to that will be executed. TO be executed, the class must contain a
public static void main(String[] args)method.
You can run a Java program with the java command by specifying the classpath (here target/chatsystem-XXX.jar) and the class to run (here the class Main in the chatsystem package):
java -cp target/chatsystem-XXX.jar chatsystem.Main
Another and more convenient option is to use directly your build tool to run the program: you only have to specify the main class and it will figure out the classpath itself (including all classes from your project and all classes from your dependencies).
mvn exec:java -Dexec.mainClass="chatsystem.Main"
Distribution
To distribute your application, you would ideally like to provide a single executable that will contain everything necessary to run your application: your code, your dependencies and possibly some resource files (logo, ...).
With Maven, we saw that you can build a .jar containing all your code with maven package. However, this jar will not contain your dependencies that hence must be provided independently.
The solution to this problem is to build a fat jar: a jar file that contains all your code and all your dependencies.
Following the tutorial here, you can configure maven so that maven package builds both a normal jar and a fat jar.
To distribute your application, you can then only provide the fat jar that the user will be able to run with java -jar path-to/fat-jar.jar.
The Art of Readable Code
The Art of Readable Code is a book by Trevor Foucher, Dustin Boswell in which they argue that
Code should be written to minimize the time it would take for someone else to understand it.
The focus in on code (i.e. mostly at the function level) rather than at a whole program but is packed with many examples and very easy to follow. The authors provide a large number advices for improving the readability of the code including:
- naming (variables, functions, ...)
- how to provide meaningful (non-redundant comments)
- simplifying the control flow and expressions
- structuring the code
To give you an idea of why these advices are important based on my personal experience as a teacher. When I am called by students to help them fix a bug in their code, we almost always rewrite their code (together) following very much the advices from this book. Without that, there is no way I can understand precisely what their code does (and whether it does what it was meant to). Usually, once we are done rewriting it, the bug becomes obvious (to me and most importantly to them as well).
📘 The Art of Readable Code – Cheatsheet (generated by an LLM)
🎯 Core Idea
Readable code is code that clearly communicates its intent to humans first, machines second. It prioritizes clarity, simplicity, and maintainability over clever tricks.
1. Foundations of Readability
- Clarity > Brevity: Short code isn’t always better if it sacrifices understanding.
- Code is for People: Machines don’t care about readability—future developers do.
- Minimize Cognitive Load: Reduce mental effort needed to understand code.
2. Naming Things
- Descriptive Names: Reveal intent (
maxUploadSize>x). - Avoid Ambiguity: Use precise terms (
sendEmailvs.process). - Length Tradeoff: Longer names for larger scopes, shorter for local contexts.
- Consistency: Stick to project-wide vocabulary.
3. Code Structure & Formatting
- Order Matters: High-level concepts before details.
- One Idea per Line/Block: Avoid overload.
- Whitespace & Indentation: Use spacing to emphasize structure.
- Align & Group: Visually cluster related code.
4. Functions & Logic
- Short Functions: Easier to understand, test, and reuse.
- One Responsibility: Each function should do one thing.
- Readable Conditions:
- Replace complex booleans with helper functions.
- Use positive phrasing (
isValid>notInvalid).
- Avoid Cleverness: Readability > showing off.
5. Comments
- Explain Why, not What: Code shows “what,” comments explain rationale.
- Sparingly: Prefer self-explanatory code.
- Keep Accurate: Outdated comments are worse than none.
6. Code Simplification
- Eliminate Unnecessary Work: Don’t over-engineer.
- Refactor for Simplicity: Break big problems into smaller parts.
- Avoid Duplication: Consolidate repeated logic.
- Progressive Refinement: Improve readability step by step.
7. Testing & Maintainability
- Readable Tests: Tests should describe behavior clearly.
- Defensive Coding: Anticipate misuse by future readers.
- Refactor Continuously: Keep code clean as project evolves.
8. Mindset & Habits
- Empathy for Future Readers: Write code for your “tired classmate.”
- Iterate: First drafts aren’t the most readable.
- Balance: Focus on reducing the biggest sources of confusion.
🚀 Key Takeaways
- Treat code as communication, not just instructions.
- Optimize for readability & maintainability in collaborative projects.
- Apply principles in order: clear naming → structured formatting → simple functions → meaningful comments.
- Always ask: “If I return in 6 months, will I understand this immediately?”
Teaching Resources
Teaching resources are provided in private git repositories to which only teachers have access. To gain access send an email to Arthur Bit-Monnot specifying your github identifier.
- Main Repository
- Sources of the lectures and the content of this website
- Corrections for hands-on sessions (inlined in the markdown sources)
- Reference code
- Example implementation for Phase 1